Elasticsearch 是目前全文搜索引擎的首选,它可以快速地储存、搜索和分析海量数据,下面简称 ES。
ES 底层是开源库 Lucene。但是没法直接用 Lucene,必须自己写代码去调用它的接口。ES 是 Lucene 的封装,提供了 REST API 的操作接口,开箱即用。
安装
ES 需要 Java 8 环境。如果你的机器还没安装 Java,可以进行下载安装。
ES 的安装比较简单,直接下载对应版本的压缩包解压即可:
1 | curl -O https://artifacts.elastic.co/downloads/elasticsearch/elasticsearch-8.4.3-darwin-x86_64.tar.gz |
这里下载安装的是最新版本 8.4.3。
首次解压完并不能直接运行,需要稍微修改一些配置(如果你的机器有配置证书则可以忽略,这是因为 ES 默认开启了 ssl 认证):
1 | // vim elasticsearch.yml |
进入解压后的目录,运行下面的命令,启动 ES:
1 | bin/elasticsearch |
如果这时报错 “max virtual memory areas vm.maxmapcount [65530] is too low”,要运行下面的命令。
1 | sudo sysctl -w vm.max_map_count=262144 |
如果一切正常,ES 就会在默认的 9200 端口运行,访问localhost:9200会返回如下信息:
1 | { |
head 插件安装
elasticsearch-head 是一个ES 集群的 Web 前端控制台,可以可视化管理 ES。
安装也是非常简单,直接下载解压运行即可:
1 | git clone git://github.com/mobz/elasticsearch-head.git |
elasticsearch-head 默认监听 9100 端口,正常访问 localhost:9100 会看到如下界面:
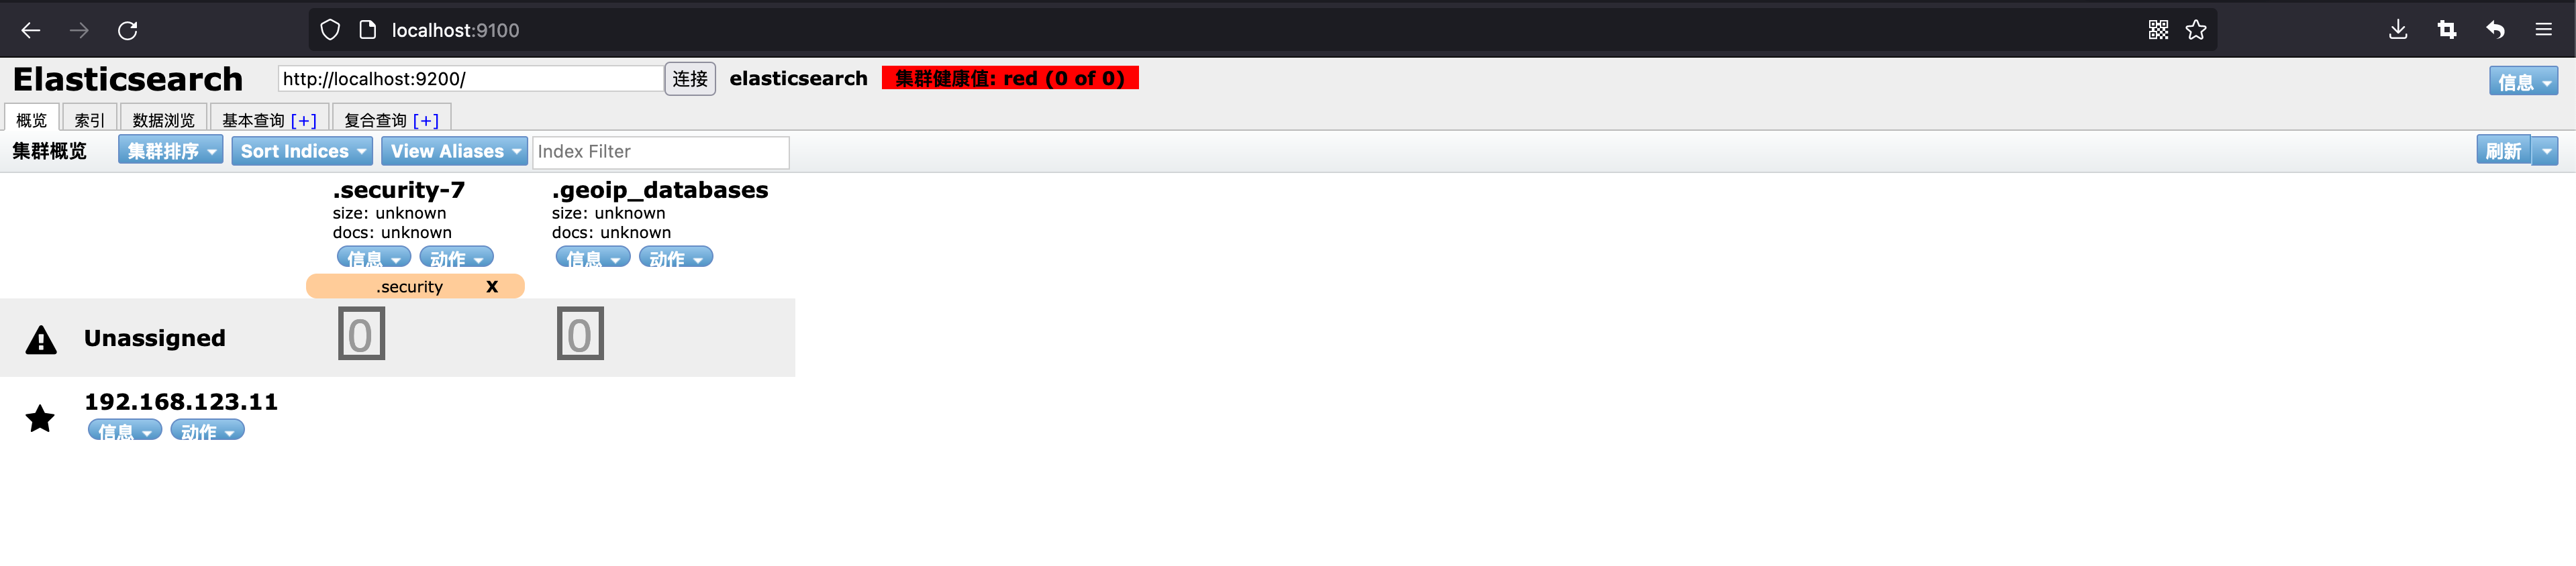
注意看,我这里的集群健康值是 red,索引的旁边出现了一个 unassigned,出现 unassigned 的原因通常有:
- 磁盘空间不足(控制磁盘使用的高水位。默认为90%)
- nodes 数小于分片副本数
- 节点失联
健康值有三个值:
- green
- yellow
- red
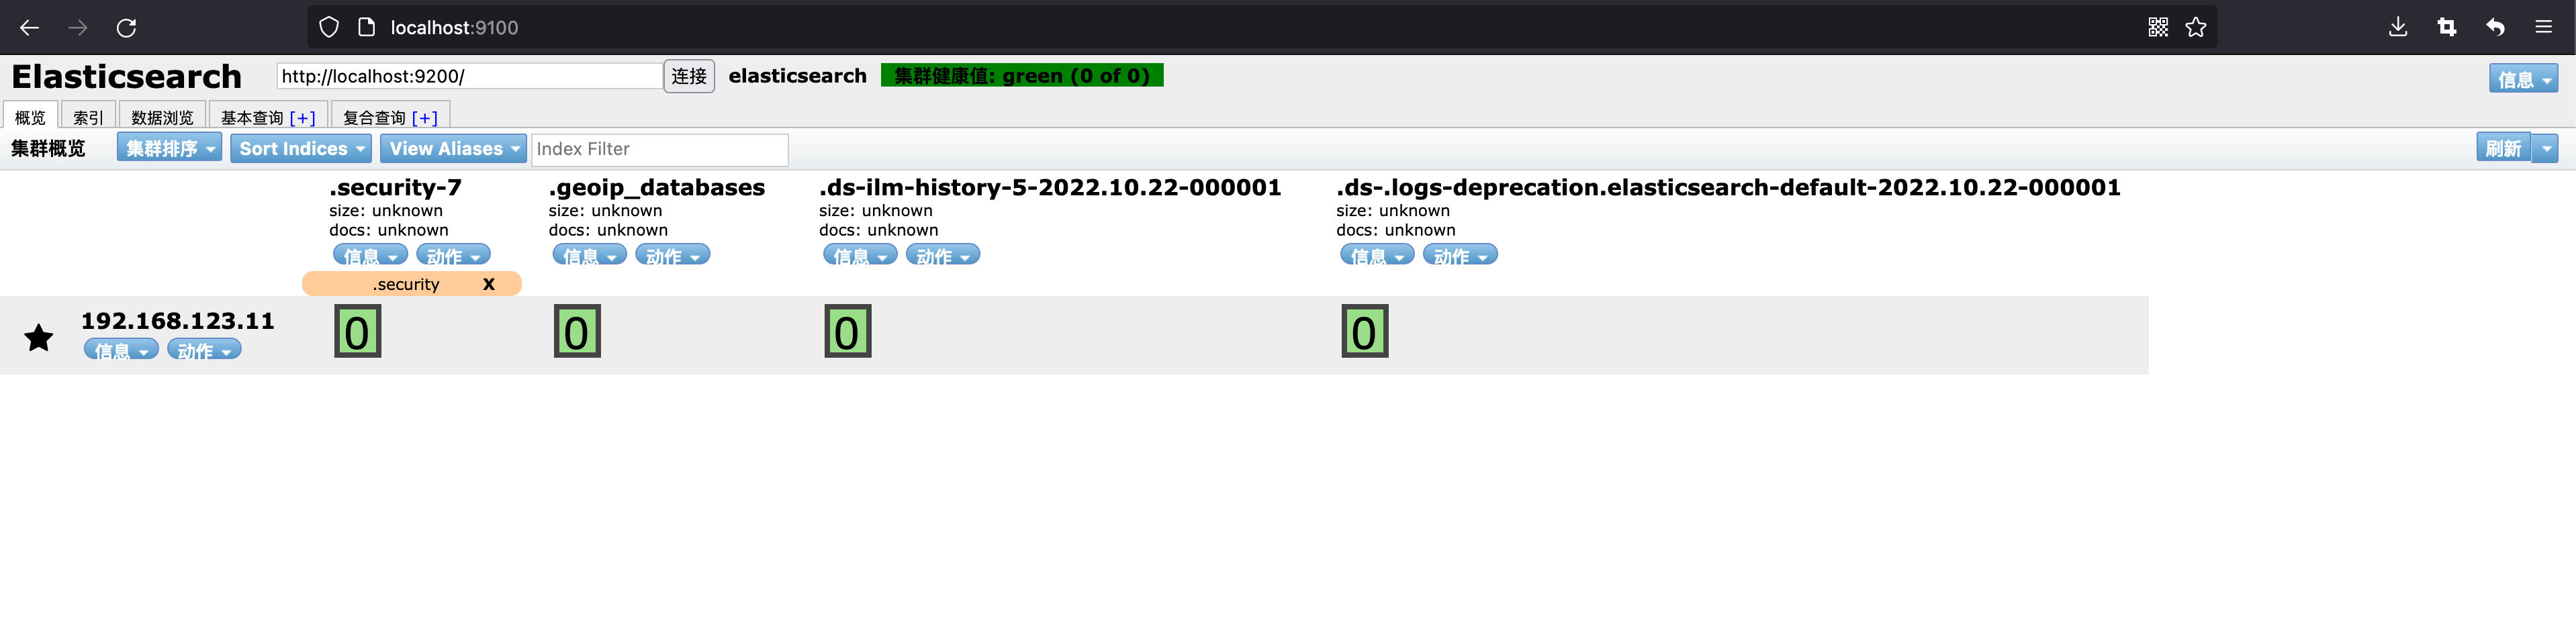
如果处于 red,很多操作是做不了的,我这里是因为磁盘空间不足而导致的,释放掉磁盘空间之后便恢复 green 了:
基本概念
Node 与 Cluster
ES 本质上是一个分布式的数据库,允许多台服务器协同工作,每台服务器也可以同时运行多个实例。
单个 ES 实例称为一个节点(node)。一组节点构成一个集群(cluster)。
Index
Index 是 ES 的核心概念,ES 会索引所有字段,经过处理后写入一个反向索引(Inverted Index)。查找数据的时候,直接查找该索引。
ES 数据管理的顶层单位就叫做 Index(索引)。它是单个数据库的同义词。每个 Index (即数据库)的名字必须是小写。
Document
Index 里面单条的记录称为 Document(文档)。许多条 Document 构成了一个 Index。
Document 使用 JSON 格式表示,下面是一个例子:
1 | { |
Type
数据操作
创建索引
创建 Index,可以直接向 ES 服务器发出 PUT 请求。
1 | # 创建一个 weather 的 Index |
删除索引
通过 DELETE 请求删除 Index
1 | curl -X DELETE 'localhost:9200/weather' |
新增记录
1 | curl -X PUT "localhost:9200/customer/_doc/1?pretty" -H 'Content-Type: application/json' -d' |
pretty 参数的作用是以易读的格式返回。
注意,这里请求地址是customer/_doc/1,最后的1是该条记录的 Id。它不一定是数字,任意字符串(比如abc)都可以。
新增记录的时候,也可以不指定 Id,这时要改成 POST 请求。
1 | curl -X POST "localhost:9200/customer/_doc?pretty" -H 'Content-Type: application/json' -d' |
需要注意的是,使用该请求方式时,如果对应的索引不存在(例子中是customer),ES 则会自动创建该索引。
查看记录
通过 elasticsearch-head 查看数据:
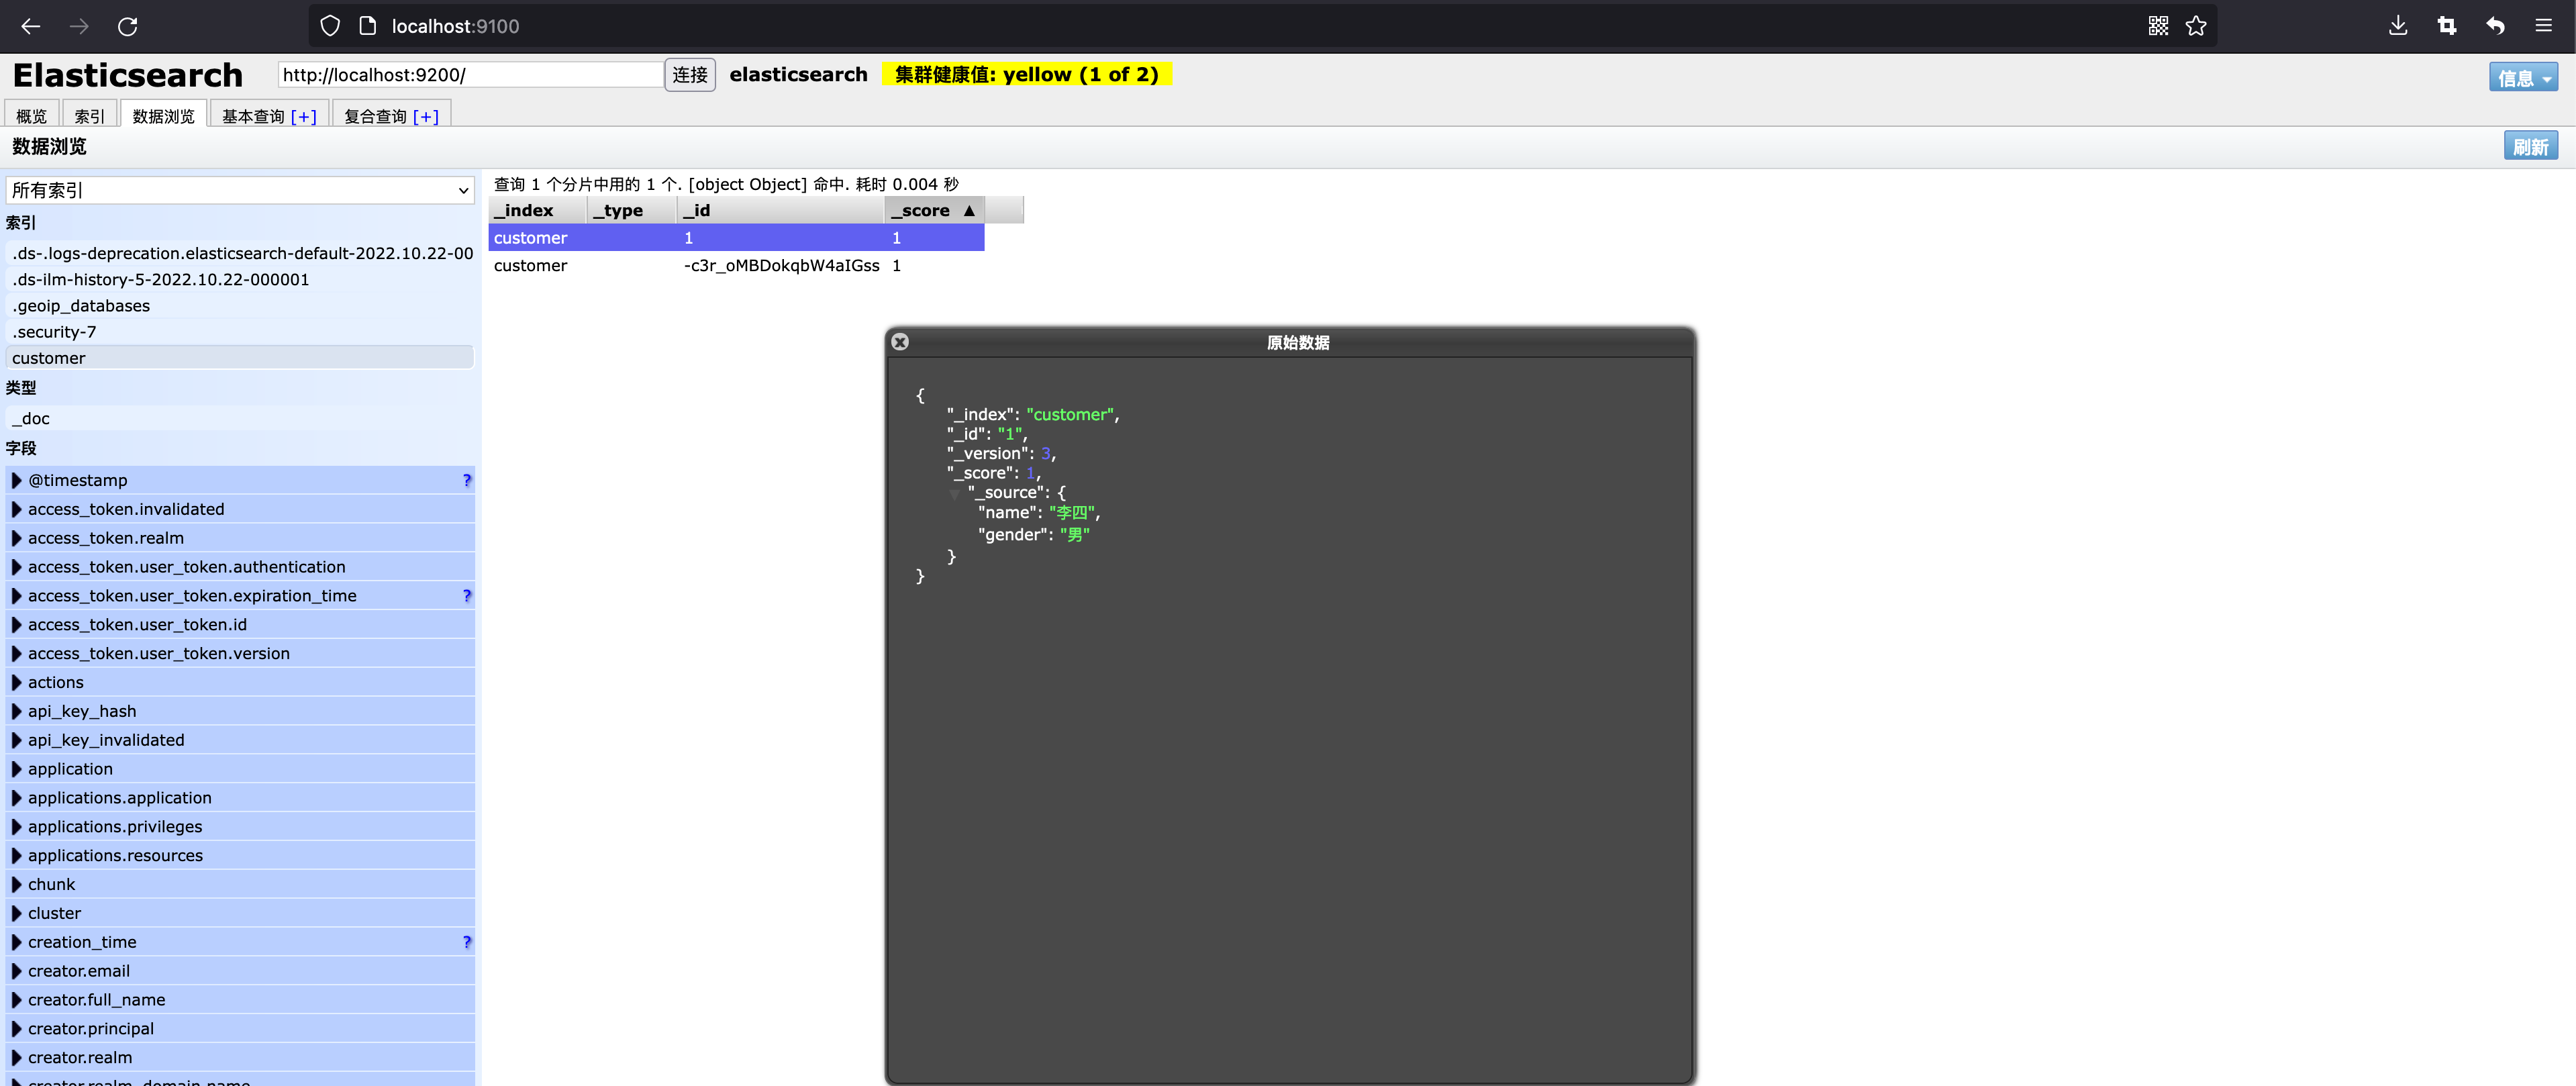
通过终端指定 Document ID 查看对应的记录:
1 | curl -X GET "localhost:9200/customer/_doc/1?pretty" |
返回的数据中,found字段表示查询成功,_source 字段返回原始记录。如果 Id 不正确,就查不到数据,found字段就是false。
更新记录
1 | curl -X PUT "localhost:9200/customer/_doc/1?pretty" -H 'Content-Type: application/json' -d' |
上面代码中,将原始数据从”李四”改成“王五”。 返回结果里面,有几个字段发生了变化。
1 | "_version" : 2, |
可以看到,记录的 Id 没变,但是版本(version)从1变成2,操作类型(result)从created变成updated,created字段变成false,因为这次不是新建记录。
删除记录
删除记录就是发出 DELETE 请求。
1 | curl -X DELETE 'localhost:9200/customer/_doc/1' |
数据查询
返回所有记录
最新版本的 ES,通过请求/Index/_search,就会返回对应索引下的所有记录。
1 | curl -X GET "localhost:9200/customer/_search?pretty" |
上面代码中,返回结果:
- took 字段表示该操作的耗时(单位为毫秒)
- timed_out 字段表示是否超时
- hits 字段表示命中的记录
hits 的子字段的含义如下:
- total:返回记录数
- max_score:最高的匹配程度
- hits:返回的记录组成的数组
返回的记录中,每条记录都有一个 _score 字段,表示匹配的程序,默认是按照这个字段降序排列。
全文搜索
ES 的查询非常特别,使用自己的查询语法,要求 GET 请求带有数据体。
1 | curl -X GET "localhost:9200/_search?pretty" -H 'Content-Type: application/json' -d'{ |
